The owner of this AMG Mercedes had contacted me some time ago as he wanted to ensure that his newly acquired pride and joy was properly protected from the harsh environmental conditions with a protective layer of Optimum Opti-Coat.
Optimum Opti-Coat forms a PERMANENT protective layer on the surface of the paint which helps protect the original paint from environmental damage. The Optimium Opti-Coat adds 2-3 microns to the thickness of the paint and is harder and more scratch resistant than the original factory paint. Optimum Opti-Coat also has superior hydrophobic properties which helps to ensure that dirt or other contaminants are less likely to bond with the paint and to make cleaning and maintaining the paint easier. Should there be any need to remove any stains which have bonded to the paint such as watermarks, the Optimum Opti-Coat can be polished while leaving the original factory paint untouched.
A common misconception with regards to coating is that the coat itself is the most important part of the process. The coating does matter but it is the surface preparation that makes all of the difference to the appearance of the paint and the coating is added as the last step to protect the paint. Any paint defects that are not corrected will be sealed in by the coating and hence it is critical to ensure the paint is properly corrected before coating.
This Mercedes Benz AMG E-Class took well over 15 hours and two-days to carry out the paint correction and Opti-Coating of the exterior and glass surfaces.

A....M....G....

Swirls and RIDS....


No need to PANIC!!!

Optimum Hyper Compound and Optimum Hyper Polish are here to save the day....


After many, many, hours... lots of sweat and a little beer....


Full details of this detail after the link:
Nice number...

As with most white cars which have been kept clean, it doesn't look too bad on first inspection.


AMG wheels not looking their best...

Scuff marks on side skirts...

AMG exhaust tips...

Upon closer inspection, the paint looked dull and there were some stains baked into the hood.

A bit difficult to capture on camera but the slightly darker area in the middle is the stain...

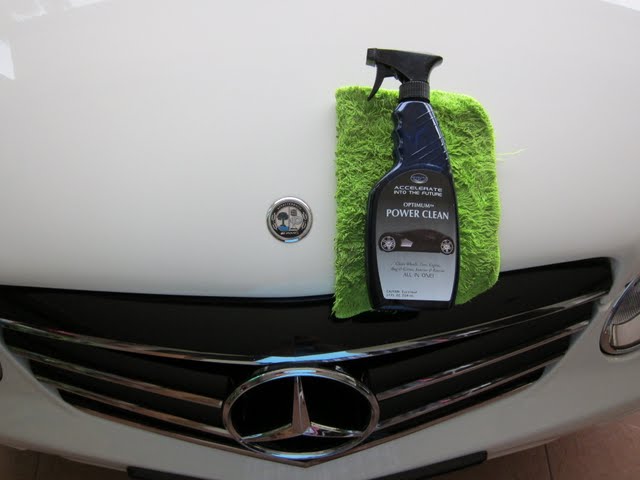
Started out with a complete cleaning of the exterior surface with Optimum Power Clean.
Certain hard to reach areas required a brush...


Stains removed...

Exhaust tips also Optimum Power Cleaned.


AMG wheels also cleaned with Optimum Power Clean and a brush.

Before:


After:


50/50...

Areas such as these vents also cleaned with Optimum Power Clean and a brush.


Fingernail marks on drivers side door handle...

Removed with Optimum Power Clean.


After a thorough cleaning with Optimum Power Clean the car was clayed with Optimum Opti-Clay with Optimum No-Rinse as a clay lube.

The car had a lot of surface contamination and this is what the clay looked like after just one section of the hood.

After a thorough cleaning.... looks pretty good.


Ready for coating???
Not quite.....
Optimum Opti-Coat forms a permanent 2-3 micron protective layer on top of the original paint. As such, it is imperative that all paint defects be properly corrected BEFORE the Optimum Opti-Coat is applied.
It is very difficult to document paint issues with white pain as there is less contrast between the paint and the defects. Upon closer inspection with a halogen lamp, the issues with the paint become more obvious.
Swirls and Random Isolated Deep Scratches (RIDS) everywhere!!!
Even the AMG logo was not spared...


No need to PANIC!!!
All of the vents, plastic and rubber trim were taped off before correction.


A test area was marked out on the front hood.

First up, Optimum Hyper Compound with the Optimum Double-Sided Wool Pad on a Makita 9227C Rotary Polisher.

The compounding is meant to correct the major defects and will have to be followed by Optimum Hyper Polish with a polishing pad on the Flex 3401 Forced Rotation Dual-Action polisher. The Flex is a really great tool as the forced rotation gives it some correcting ability while the dual-action ensures that the finish is perfect every time.

50/50 or should I say 25/25...
If you look closely, you can see a line down the middle with the corrected portion on the right and the remainder of the hood dull and oxidized.

Notice that the front right portion of the hood has been restored to the original white color.


The corrected left side is noticeably whiter than the original paint on the right.

50/50.

Before:
The reflection is dull and not very sharp.

After:
Compared with the picture above there is big difference in the clarity and sharpness of the reflection.

Before:

After:

Plenty of swirls before.

50/50.


A shot from the roof.... plenty of swirls up here also.

Defects removed after compounding with Optimum Hyper Compound. Although all of the major paint defects have been removed, if you look closely you can see some hazing left behind by the compounding which will be removed during the polishing step.

The boot lid had some major swirls and RIDS.

Taped off for a 50/50.

Major paint defects removed after compounding. The area will still need to be polished to removed the slight traces of hologramming caused by the compounding.


After polishing...

By the time the compounding was finished, it was getting pretty late and some 'refreshments' were required to keep me going...

Polishing with Optimum Hyper Polish was carried out next. The combo of the Optimum Hyper Polish and the Flex 3401 left the paint flawless and guaranteed that there were no holograms left behind.


The front grilles was also corrected with the Flex and Optimum Hyper Polish combo.


Much better...

Couldn't resist taking this shot of the unique patterns left behind by the Flex...

The original Mercedes paint also looked great with a lot of depth and clarity after polishing. The metallic flakes in the paint really popped out which I tried to capture in this picture.

The B-Pillars were also very badly swirled up and the paint was very soft and easily scratched.

After compounding...

After polishing to remove the compounding marks.

Passenger side...

After:

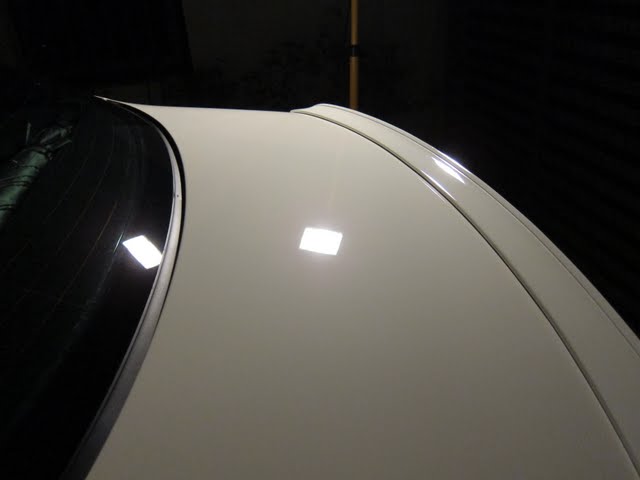
It was now time for coating... Note the nice gloss and depth to the paint even before coating.


After coating...

I love these reflection shots...


All of the plastic trim including the front grille were also coated with Optimum Opti-Coat.


It was very, very, early in the morning by the time I got done applying the coating. I wanted to get the coating completed immediately after polishing and also to give the coating time to cure by the next day. Optimum Opti-Coat cures to the touch in 30mins and 'fully' cures in about 12 hours. Depending on weather conditions it will continue to harden over the next few days before achieving its maximum strength.
I really do love these after shots. The paint looks amazingly glossy with a deep wet look even on white.
This really does make it all worthwhile.


Will post the interior cleaning and glass polishing process and pics in another post.
Thanks for looking.
No comments:
Post a Comment